Making and crafts
Make a friendship bracelet
Braid three thick strands of yarn into a simple bracelet or bookmark tassel, taped to the table.
For enjoyment and time together. Adaptations are suggestions, not medical advice. Questions about health or safety go to a doctor or care team.
- Setup
- About 10 minutes
- Activity
- 20–60 minutes
- Cost
- Low cost
- Mess
- No mess
- Where
- At a table, seated-friendly, bedside
- Help
- Someone nearby
Not for under 3: small parts.
Materials: 4 everyday things, listed below
Large-print card (same steps, bigger type)
Who might enjoy it: People who like yarn, braiding or hair-plaiting, or who enjoy a steady rhythm with their hands. A good choice for a quiet hour of making with one person or a few.
What you need
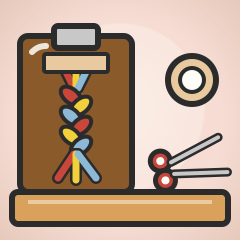
- Three colors of thick yarn or embroidery thread, each cut by the helper to about 16 inches long
- Scissors for the helper only
- Masking tape to hold the strands to the table
- A clipboard or a tray for a lap
No need to buy anything special
- No yarn? Use shoelaces, ribbon or strips of an old soft T-shirt, cut by the helper.
- No masking tape? Use a clip or a clothes peg to hold the strands to the tray.
What to do
- Lay the three strands side by side and tie one loose knot at the top, leaving a tail of about two inches.
- Tape the knot to the table or tray so it stays still.
- Spread the three strands apart, with one on each side and one in the middle.
- Take the right strand and lay it over the middle one.
- Take the left strand and lay it over the new middle one.
- Keep going, right over middle, then left over middle, pulling each strand snug but not tight.
- When the braid is long enough to go around the wrist or lie in a book, tie a loose knot at the end.
- Trim the ends to a short tassel, or tie the bracelet around a wrist loosely. The helper does the trimming.
It is okay to stop or change it
It is fine to stop whenever you like. Tape the end down, leave the braid on the table, and pick it up another day, or leave it as a short bookmark.
Pause or stop if the person seems to be in pain, distressed or tired, or simply wants to stop. Trying again another day is fine.
Did you try this?
Your answer helps us make better cards. We record the activity and your choice, not who took part.
A tidier version may be under Make it easier or different. See the easier options
An easier version may be under Make it easier or different. See the easier options
Check the substitutes under What you need. See what you need
Another activity may suit better. Find another activity
A calmer version may be under Make it easier or different. See the calmer options
Look for an activity with a simpler layout. Find another activity
Another activity may suit better. Find another activity
Make it easier or different
- Make it easier
- Start the braid ahead of time and use only two or three crossings together, or braid with one color on a chunky cord.
- Easier to grip
- Use very thick yarn or strips of cotton fabric, and braid with the whole hand. Make a long bookmark instead of a wrist-sized bracelet.
- In bed or an armchair
- Tape the knot to a clipboard on a lap tray and braid for a few minutes at a time, putting the yarn down whenever you like.
- For low vision
- Use three strongly different colors on a plain dark surface, and say each move aloud: right over, left over.
- With children
- A child holds the knot steady while the grandparent braids, then swap. Choose the three colors together.
Safety
- Check for glue or tape sensitivity
- Adult needed for sharp tools
- Not for under 3: small parts
- Check for skin sensitivity to paint or materials
- Check the chair and space before standing
- Scissors are for the helper only. Cut the strands before you start and put the scissors away.
- Keep strands short, never wrap yarn around a neck, and take a bracelet off if it feels tight. Keep long strands away from the neck.
- Loose ends can be swallowed or chewed. Supervise if anyone might put yarn or tassel ends in the mouth.
- Choose soft yarn that does not itch or irritate sensitive skin, and gather up loose yarn so nobody trips on it.
These are practical suggestions, not medical advice. You know the person best.
Braiding three strands is an old, simple rhythm: right over, left over. Taping the top to the table frees both hands, so the work is steady and easy to pause. It makes a quiet hour of making, and the result is a bracelet, a bookmark or a gift for someone.