Making and crafts
Make a tissue paper window picture
Press torn pieces of colored tissue paper onto clear sticky film, then hang it in a window to let light shine through.
For enjoyment and time together. Adaptations are suggestions, not medical advice. Questions about health or safety go to a doctor or care team.
- Setup
- About 15 minutes
- Activity
- 15–30 minutes
- Cost
- Low cost
- Mess
- No mess
- Where
- At a table, seated-friendly, bedside
- Help
- Someone nearby
Not for under 3: small parts.
Materials: 5 everyday things, listed below
Large-print card (same steps, bigger type)
Who might enjoy it: People who like bright colors, sunny windows or watching light change a picture. A good choice for someone who enjoys placing things freely, with no plan and no wrong place.
What you need
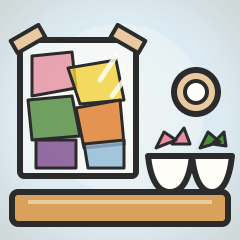
- Clear self-adhesive film (contact film), cut by the helper to about letter size
- Colored tissue paper, torn beforehand into pieces about the size of a palm
- Two or three shallow bowls to sort the colors
- Masking tape, for the helper to hold the film and to hang it
- Scissors, for the helper to use beforehand only
No need to buy anything special
- No contact film? Use clear laminating sheets that are sticky on one side.
- No tissue paper? Use thin colored cellophane or the thin paper from gift wrap.
What to do
- Before you start, the helper cuts the film to size, peels off the backing and tapes it sticky side up to the table.
- Put the bowls of tissue pieces within easy reach.
- Choose a color together. Any color is a good one.
- Pick up a piece and press it onto the sticky film anywhere you like.
- Add more pieces, and let them overlap so the colors mix.
- Stop when the picture feels full or you are ready to be done.
- The helper lays a second piece of film over the top or folds the first one in half, and smooths it down.
- Hang the picture in a window and look at the light coming through.
It is okay to stop or change it
It is fine to stop with only a few pieces on the film. A sparse picture lets in plenty of light, and you can add more another day.
Pause or stop if the person seems to be in pain, distressed or tired, or simply wants to stop. Trying again another day is fine.
Did you try this?
Your answer helps us make better cards. We record the activity and your choice, not who took part.
A tidier version may be under Make it easier or different. See the easier options
An easier version may be under Make it easier or different. See the easier options
Check the substitutes under What you need. See what you need
Another activity may suit better. Find another activity
A calmer version may be under Make it easier or different. See the calmer options
Look for an activity with a simpler layout. Find another activity
Another activity may suit better. Find another activity
Make it easier or different
- Make it easier
- Offer one color at a time in a single bowl, and place the first piece together.
- Seated
- Tape the film to a lap tray or a tray table at a comfortable height, with the bowls on the same tray.
- Easier to grip
- Use big pieces of tissue, about the size of a whole hand, so they can be held in a fist and pressed down with the flat of the palm.
- For low vision
- Use strong, dark colors such as deep blue, red and green, and hang the picture where the sun is bright.
- In bed or an armchair
- Tape the film sticky side up to a firm tray on the bed table, with one bowl of pieces. The helper holds the tray steady and hangs the picture by the bed.
- With children
- The older adult chooses each color and where it goes, and the child hands over the pieces and presses them flat. Cutting stays with an adult.
Safety
- Not for under 3: small parts
- Adult needed for sharp tools
- Check for glue or tape sensitivity
- Check for skin sensitivity to paint or materials
- Keep away from mouths
- Check the chair and space before standing
- The helper cuts the film with scissors beforehand and puts them away. The person does not cut anything.
- Keep small torn tissue pieces and the film away from the mouth, and stay nearby while they are out. Clear them away afterward.
- Check for sensitivity to the sticky film or tape, and keep the sticky side off bare skin and hair.
- The helper hangs the picture, using a stable chair or step stool if needed. The person does not climb or lean out.
These are practical suggestions, not medical advice. You know the person best.
The sticky film holds every piece where it lands, so there is no glue to spread and nothing to cut. Hanging the finished picture in a window gives the colors a reason to be looked at again through the day.
What to try next
- Making and craftsMake a torn paper mosaic10 min setup · 15–40 min activity · seated-friendly
- Making and craftsMake a color collage10 min setup · 20–40 min activity · seated-friendly
- Painting and drawingPaint a shared picture15 min setup · 30–60 min activity · seated-friendly
- Touch and textureMake a texture board15 min setup · 15–40 min activity · seated-friendly