Making and crafts
Make a torn paper landscape
Tear long strips of colored paper and layer them into sky, hills and ground.
For enjoyment and time together. Adaptations are suggestions, not medical advice. Questions about health or safety go to a doctor or care team.
- Setup
- About 10 minutes
- Activity
- 15–40 minutes
- Cost
- Free
- Mess
- Little mess
- Where
- At a table, seated-friendly, bedside
- Help
- Someone nearby
Not for under 3: small parts.
Materials: 4 everyday things, listed below
Large-print card (same steps, bigger type)
Who might enjoy it: People who like colors, the outdoors or making pictures with their hands, and who would rather tear and place paper than draw. A good fit for a relaxed afternoon at a table.
What you need
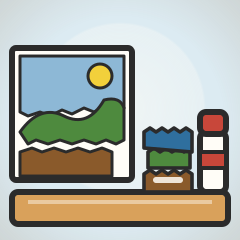
- Scrap paper in blues, greens and browns, such as old envelopes, wrapping paper or painted scrap
- A sheet of card or thick paper, about letter size
- A glue stick
- A tray or box lid to hold the torn strips
No need to buy anything special
- No colored paper? Use paper bags, junk mail, tissue paper or napkins.
- No card? Use the plain side of a cereal box.
What to do
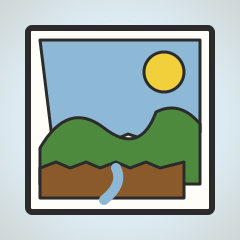
- Lay the card flat in front of the person, with the long side across if they prefer.
- Tear a few long strips of pale blue or white paper for the sky and place them in a tray.
- Tear strips in greens for hills, and strips in browns or yellows for the ground.
- Rub glue on the top third of the card and press the sky strips on, letting them overlap.
- Glue the middle of the card and press on the green strips, tearing a wavy edge along the top for hills.
- Glue the bottom and add the ground strips, overlapping the bottom of the hills.
- Add a torn round of yellow paper for a sun, or a few small green scraps for trees, if wanted.
- Press the picture flat with a clean hand and leave it to dry, then choose where to put it.
It is okay to stop or change it
It is fine to stop after the sky or after a few strips. A picture with only sky and one hill still looks good, and you can add more another day or leave it as it is.
Pause or stop if the person seems to be in pain, distressed or tired, or simply wants to stop. Trying again another day is fine.
Did you try this?
Your answer helps us make better cards. We record the activity and your choice, not who took part.
A tidier version may be under Make it easier or different. See the easier options
An easier version may be under Make it easier or different. See the easier options
Check the substitutes under What you need. See what you need
Another activity may suit better. Find another activity
A calmer version may be under Make it easier or different. See the calmer options
Look for an activity with a simpler layout. Find another activity
Another activity may suit better. Find another activity
Make it easier or different
- Make it easier
- Tear the strips in advance and place just three colors on the table: one for sky, one for hills and one for ground.
- Seated
- Work on a lap tray with a raised edge so the strips do not slide off, with the card held in place by a non-slip mat.
- In bed or an armchair
- Use a small piece of card on a lap tray, with a few strips already torn and a glue stick within easy reach.
- Easier to grip
- Use a thick glue stick, or wrap a regular one in foam so it is easy to hold. Tear wide strips that can be picked up in the whole hand.
- For low vision
- Choose strongly contrasting colors, such as dark blue sky above bright green hills, and say each color aloud as it is placed.
- With children
- A child tears the strips and hands them over while the older adult decides which strip goes where and glues it down.
Safety
- Check for glue or tape sensitivity
- Check for skin sensitivity to paint or materials
- Not for under 3: small parts
- Use a glue stick rather than liquid glue, and check for skin sensitivity first.
- Torn paper edges can nick fingers. Offer softer paper if that is a concern, and wipe glue from the fingers.
- Keep small torn scraps away from anyone who may put paper in their mouth, and clear them away afterward.
- Supervise closely while small torn scraps are on the table.
These are practical suggestions, not medical advice. You know the person best.
Long strips layered in bands are quick to place and hard to get wrong, since torn edges look like hills and clouds on their own. Each band of color is a small step you can stop after.