Large print: Make a torn paper landscape
This is the same card in bigger type, black on white. It may print on more than one sheet.
Making and crafts
Make a torn paper landscape
Tear long strips of colored paper and layer them into sky, hills and ground.
For enjoyment and time together. Adaptations are suggestions, not medical advice. Questions about health or safety go to a doctor or care team.
10 min setup15–40 min activityseated-friendlyfreeNot for under 3: small parts
What you need
- Scrap paper in blues, greens and browns, such as old envelopes, wrapping paper or painted scrap
- A sheet of card or thick paper, about letter size
- A glue stick
- A tray or box lid to hold the torn strips
Make it easier
Tear the strips in advance and place just three colors on the table: one for sky, one for hills and one for ground.
What to do
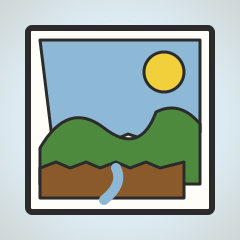
- Lay the card flat in front of the person, with the long side across if they prefer.
- Tear a few long strips of pale blue or white paper for the sky and place them in a tray.
- Tear strips in greens for hills, and strips in browns or yellows for the ground.
- Rub glue on the top third of the card and press the sky strips on, letting them overlap.
- Glue the middle of the card and press on the green strips, tearing a wavy edge along the top for hills.
- Glue the bottom and add the ground strips, overlapping the bottom of the hills.
- Add a torn round of yellow paper for a sun, or a few small green scraps for trees, if wanted.
- Press the picture flat with a clean hand and leave it to dry, then choose where to put it.
It is okay to stop. It is fine to stop after the sky or after a few strips. A picture with only sky and one hill still looks good, and you can add more another day or leave it as it is.
Pause or stop if the person seems to be in pain, distressed or tired, or simply wants to stop. Trying again another day is fine.
Safety
- Check for glue or tape sensitivity
- Check for skin sensitivity to paint or materials
- Not for under 3: small parts
- Use a glue stick rather than liquid glue, and check for skin sensitivity first.
- Torn paper edges can nick fingers. Offer softer paper if that is a concern, and wipe glue from the fingers.
- Keep small torn scraps away from anyone who may put paper in their mouth, and clear them away afterward.
- Supervise closely while small torn scraps are on the table.
More versions and safety notes: creativeactivities.org/activity/make-a-torn-paper-landscape/. Report a safety problem: creativeactivities.org/corrections/#report-safety. Corrections: creativeactivities.org/corrections/